How To Guides · June 12, 2026
How to Automate Your Home Office for Streamlined UK Innovator Visa Preparation
Discover how integrating NFC tags and AI-driven Homebridge automations can enhance your home office efficiency and accelerate your UK Innovator Visa application process.

Transform Your Workspace into a Visa-Prep Powerhouse
Your home office should be more than a desk and a chair. With the right Home Office Automation you can transform it into a productivity hub that practically runs itself. Imagine waving your smartphone at an NFC tag to launch a scene that prepares your workspace for an intense planning session on your UK Innovator Visa application. No fiddling with switches or hunting for cords. Just seamless automation.
In this guide we’ll show you how to integrate NFC tags, Apple Shortcuts and Homebridge to orchestrate lights, cameras and reminders. You’ll learn to shave hours off menial tasks, freeing up brain-space for strategic thinking and business-plan crafting. Ready to streamline your visa journey? Home Office Automation with our AI-Powered UK Innovator Visa Application Assistant
Why Home Office Automation Matters for Your Innovator Visa
The challenge of juggling tasks and visa prep
Preparing a UK Innovator Visa is a multi-layered process. You have to research endorsing bodies, gather financial documents, draft a market analysis and nail your pitch. Meanwhile your home office needs daily maintenance—lights, devices, and a recording setup for virtual meetings. It’s easy to get overwhelmed.
Automation frees up time and reduces errors
With simple NFC tags and plug-and-play automations you can:
- Switch on your webcam and ring lights in one tap
- Trigger document-check reminders at 9am sharp
- Dim or brighten bulbs for video calls automatically
- Receive alerts when you miss a compliance checkpoint
Less context-switching, fewer mistakes, more headspace for your application.
Torly.ai: your AI-driven co-pilot
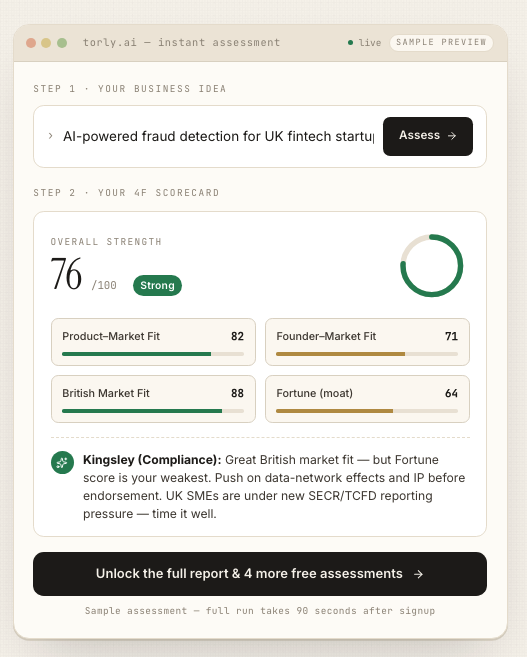
While you focus on innovations, Torly.ai handles the visa-readiness checks. This advanced AI assistant:
- Evaluates your business idea against Home Office and endorsing-body criteria
- Analyses your background for endorsement suitability
- Delivers a personalised action roadmap to close any gaps
Pairing Torly.ai with Home Office Automation means you’ll never miss a deadline or overlook a form. Plus, integration is effortless. Need a desktop tool for offline access? Get the TorlyAI Desktop APP to work seamlessly even without constant internet. Get the TorlyAI Desktop APP
Step-by-Step Guide to NFC-Based Automation
Creating NFC-triggered routines is simpler than it sounds. Here’s how to get started.
1. Choose the right NFC tags
Invest in a pack of rewritable NFC tags. They cost under £10 and stick anywhere: your desk, wall or even a favourite mug. Look for tags compatible with iPhone and Android.
2. Create Shortcuts for key tasks
Open the Shortcuts app on your iPhone or iPad:
- Tap + to create a new Shortcut.
- Select Add Action, then Toggle Accessory or Scene.
- Choose your smart plug (for a webcam, ring light or coffee machine).
- Save the Shortcut as something memorable, like “Prep for Visa Call”.
3. Pair NFC tags in the Shortcuts app
Head to Automation, hit +, then NFC. Scan your blank tag and assign the Shortcut you just made. Set it to run immediately. Now a tap with your unlocked phone triggers your scene.
Bonus: set up a Home-app automation so that when your smart plug turns on, a desk lamp also lights up. That way you get visual confirmation without opening an app.
Extending Automation with Homebridge
Homebridge bridges the gap between unsupported devices and Apple Home. You can control Elgato Key Lights, bespoke sensors and more.
Installing Homebridge on macOS
- Install Node.js via the official installer.
- In Terminal run:
sudo npm install -g --unsafe-perm homebridge homebridge-config-ui-x

   sudo hb-service install

hb-service update-node - Confirm Homebridge UI at
http://localhost:8581.
Adding smart lights and accessories
In the Homebridge UI, go to Plugins, search for “Key Lights” or any accessory you own. Install, then scan the two QR codes in the Home app to add bridges. Your lights appear like standard HomeKit devices.
Designing triggers and scenes
Now build scenes:
- Podcast Mode: turns on camera, ring lights and key lights.
- End of Day: shuts down devices, dims last-mile lights.
- Daily Brief: at 8.45am, on weekdays, your desk light pulses twice—your cue to prep paperwork.
Halfway through your upgrade process it helps to revisit your visa requirements. Ensure you keep evidence of innovation logs and financial forecasts. For a seamless business plan workflow, you can also Start building your business plan now with our AI-powered assistant
Automations to Accelerate Your Visa Prep
Beyond lights and plugs, you can automate core visa-prep steps.
Daily planning reminders
Use your smart speaker or HomeKit notifications to ping you at 9am for “Visa task of the day”. The reminder Shortcut can open a draft in Notes or your preferred app.
Document checklist automation
Create a cloud folder structure and a Shortcut that runs every Friday evening. It checks for missing files, then sends you a summary email. No more last-minute scrambling.
Real-time compliance alerts
Integrate Torly.ai’s dynamic scoring API to your workflow. When your AI assistant spots a gap—say a missing proof of funds document—it can trigger a HomeKit notification: your desk lamp flashes amber until you address it.
Best Practices and Tips
- Label your NFC tags clearly with a Sharpie
- Keep automations simple—start with one scene, then expand
- Test triggers in different light levels (NFC tags can be finicky)
- Back up Homebridge config in Git or cloud storage
- Secure your network—use strong passwords and two-factor authentication
FAQs on Home Office Automation and Visa Preparation
Q: Can I use Android devices for these automations?
A: Yes—there are NFC-mapping apps on Android, but the Shortcuts-style integration is most seamless on iOS.
Q: What if Homebridge updates fail?
A: Run sudo npm install -g homebridge@latest and sudo hb-service update-node in Terminal to bring everything up to date.
Q: How do I ensure my visa application is compliant?
A: Use Torly.ai’s AI readiness checks to validate every section of your application against real Home Office guidance.
Testimonials
“Working with Torly.ai was a revelation. The AI flagged gaps I’d missed, and my home office automations mean I start each day fully focused. I got my Innovator Visa on the first try.”
— Priya S, London-based Entrepreneur
“Combining NFC-powered lighting scenes with Torly.ai’s compliance alerts saved me hours a week. I felt confident every step of my visa journey.”
— Mark T, FinTech Founder
Ready to Automate and Accelerate Your Visa Journey?
From simple NFC tags to advanced AI-driven compliance checks, you can turn your workspace into a high-efficiency engine. No more manual toggles, no more missed deadlines—just smooth, stress-free preparation for your UK Innovator Visa. Start your free trial
Frequently Asked Questions
What is the UK Innovator Founder Visa?
Source: UK Home Office
How much does the UK Innovator Founder Visa cost?
- Visa application fee: £1,191
- Immigration Health Surcharge: £3,105 (3 years)
- Minimum business investment: £50,000
- Endorsement body fee: £500 - £1,500
- English language test: £150 - £200
Source: UK Home Office
How long does the UK Innovator Founder Visa application take?
- Stage 1 (Endorsement): 6-8 weeks
- Stage 2 (Visa Application): 12-16 weeks
What are the key requirements for UK Innovator Founder Visa?
- At least 18 years old
- Innovative business idea new to UK market
- £50,000 minimum investment
- Endorsement from approved body
- English language (B2 level)
- Sufficient personal savings (£1,270+)
- Business experience or relevant skills
Which endorsing bodies are authorized for UK Innovator Founder Visa?
- UK Endorsing Services (UKES) - General innovative businesses across all sectors
- Innovator International - Scalable, globally-focused businesses with international expansion plans
- Envestors Limited - Investment-ready businesses seeking equity funding
- The Global Entrepreneurs Programme (GEP) - Government-backed programme for tech entrepreneurs (invitation-only)
Note: Many previously authorized endorsing bodies (including Tech Nation, Innovate UK, universities, and accelerators) are now legacy organizations that only maintain existing endorsees and do not accept new applications.
TorlyAI recommends the best fit based on your industry and business stage.Need personalized guidance for your UK Innovator Founder Visa application?
Start Free Assessment